Friday, January 29, 2010

Baby's First Food

Good Morning everyone!

As promised yesterday, I am sharing the layouts that I have completed since the middle of the month. Here we are almost to the end of the month! How are your new year's resolutions coming along? Are you staying steadfast to your resolutions? Or have you swayed? One of my new year's resolutions was to complete those half finished projects. For one reason or another, I have put them aside and planned to come back to it later. Well, many months later (probably even years), "later" has arrived and I am getting them completed and sharing with all of you.

This layout I am sharing today, I started last year right about this same time. I am working on my grandchildren's albums. And I am not working in any particular order, so I have about 30 incomplete albums. Mind boggling isn't it? Well, I can't explain how my creative juices work...I just do whatever moves me.

So, last year, Close To My Heart had this special paper pack called "Key To My Heart." The papers were absolutely yummy. I loved the swirls and flourishes and I was so afraid of cutting into the paper, that I decided not to. LOL I used the whole sheet as my foundation sheet and backed it with a piece of cardstock to give it some stability. I took a sketch from Becky Fleck's blog. And I found my title on Bethany's blog. The baby food jars is from Masterpiece Studio. I thought it coordinated nicely with the other papers. I did a print and cut of the jars with my Wishblade, which gave me my journaling (something else I need to work more on this year and future layouts). The little journaling block on the right I embossed with white embossing powder. Then printed the little poem separately and attached it. The flourishes to the right of the layout I cut on my Wishblade as well as the spoon. Then I overlapped them as I glued them down. I popped the spoon up with some mounting foam.


Now, can you see with the layouts above how washed out the layouts look? These were taken inside under normal lighting. I wasn't too pleased so I retook the photos again, outside in my "backyard studio." Look at the difference.


Thanks for stopping by. I'm off to the laundry room, but I'll be back here to the rubber room and share the last two layouts I've done during our "rainy season" of the year! If you like what I've done, please tell me in the comment section. I love reading all the comments you all leave.

Until next time,

Happy Scrapping!

Leanne

Thursday, January 28, 2010

Overall...

Hi everyone!

I know its been a while since I've posted anything. Its not because I haven't have anything to share. Let's just say, Mother Nature isn't cooperating. I usually take pictures of my artwork outside in the backyard. Doing it this way and using natural sunlight you can really see how nicely all the colors coordinate together. So with it raining for 5 days straight, I couldn't go out into my "backyard studio." And with living in the desert, our backyard is nothing but sand. So you can only imagine how messy it would be if I stepped out there till it dried somewhat. We have still been getting on and off rain showers. This is the season... Come a few months from now, I'll be stating how hot and dry it is and wishing for rain. Oh what vicious cycle!

Well, yesterday was a good day, with the sun shining, I was able to get outside into the "backyard studio" and try to snap some photos of the layouts I've just completed. So without further ado...

This first set of layouts, I completed this month is for my monthly workshop. We used Close To My Heart's Workshop of the Go Kit, "Caboodle." This is what the layouts are suppose to look like:


Now, with my layouts, I did make some minor changes, but tried to keep basically the same. The pictures are of my twin grandsons, Jaden and Benny. The first set is of Jaden, age 14 months.


I did the same thing with this layout of Benny, except I flipped the papers over to the other side and I ran a stitch line around the outer part of the layout. Then I took my marker and connected the dots. I would have run a threaded stitch line with my machine, except the bobbin is messed up and I need to take my machine in for servicing.
On the brackets, I changed the color of them and I also used my Cuddlebug embossing folder "Swiss Dots" on it to give some more texture to the layout. Since I had already cut the piece of cardstock for my journaling, I printed my journaling out onto a transparency and laid it over the journaling block. I had adhered the transparency to the layout with regular adhesive but hid the edges underneath the pieces next to it to hide the adhesive.
I have a couple more layouts to share, so I'll try to post them later on today or first thing tomorrow.
Thanks for stopping by.
Until later....
Happy Scrapping!
Leanne

Monday, January 11, 2010

Apple of my Eye, Star in my Sky

Good Morning everyone!

Sorry I didn't get back online yesterday to post the layouts I completed the day before. My day kinda ran away with me and somewhere along the way, I lost control. LOL I did get a lot accomplished, but not necessarily creatively. You know the usual...laundry, dusting, cleaning bathrooms, etc., etc., etc. And the bad thing about it...I didn't finish! So, today, I am going to finish up with what I didn't get done yesterday. Hopefully, I'll be able to find some time to get back into the rubber room and do something fun.

What is the first thing you look at when you first meet someone new? Do you look at their hand as you shake it? Do you look at what they are wearing? Do you "size" them up at that meeting? That's called first impressions, btw! :) Well, the first thing I look at when meeting someone, new or otherwise is their eyes. They (whoever "they" are) say, "The eyes are the windows to the soul." What do you see when you look into those eyes? Do you see trust? Or confusion? Or bewilderment? Or happiness? Or mischievousness? What color are those eyes? Are they brown, or blue, or green or hazel?

So what brought on this rambling about eyes? I don't remember what motivated me (probably an article I read in a magazine) but a few years ago, when my grandchildren were a bit younger, I took pictures of their eyes. I thought what a terrific layout this would be. It was a wonderful idea...if only I could get started on it. So there the pictures sat in a file on my computer. I would think about doing the layouts and then immediately move on to something else. Can anyone say "procrastination"? LOL Well, when it finally comes down to where I even dream about doing the layout...then its time to complete it. But not only do I have just one layout to do...but I have 4 layouts to do since I took pictures of all the grandchildren's eyes that day. It was so much fun putting these layout together. Its not hard to do 2, 3 or 4 once I got the first one done.
But what do you do when you want to do 4 identical layouts, but they have to be different. At least three of them have to be different. I love doing the same layout for the twins. That's the pleasure of having twins! Then I remember I have this paper I've used for so many different things, and have enough to complete all the layouts, making them different yet having lots of similarities. I pulled out CTMH's Cocoa Cafe paper pack and sure enough...I had plenty of paper (mostly large pieces of scraps) to do all the layouts.

So let me tell you what I did for these layouts. I found this file from Chris Durnan and I love that "Live, Love, Laugh" quote and I happen to love the font Chris used to create it. I cut it on my Wishblade using CTMH's Buttercup cardstock and Cocoa cardstock. On the twin's layout, I ran CTMH's Dutch Blue cardstock through my "Big Shot" with a screen mesh I picked up at Home Depot. The stamps I used were from CTMH's "Shining Star" stamp set. All the ribbon I used on the layouts were from my stash. And to top off the the layout, I used Prima Marketing's "Say it with Crystals" which really brings some "sparkle" to the layouts.

Thanks for letting me share with you my layouts and how I go from an idea to an obsession to a completed project. Now, onto another obsession. LOL The next couple of days, I am working a layout of my children. I completed the first layout last year but seeing that I have three children, and three separate albums for them, I am duplicating the layout for each of their albums.

Thanks for stopping by!

Until next time....

Happy Scrapping!

Leanne

Sunday, January 10, 2010

Studio J

With all my talk about digital scrapbooking yesterday, I thought I should go ahead and talk about CTMH's Studio J.

Have you heard about Studio J yet? It is free online design software that allows you to create custom-printed two-page layouts you put in your albums. There is no software to purchase and install. You just need to simply log in to Studio J and start designing your layouts! You can create and immediately purchase your layouts, or you can save them for later completion and purchase. Oh my goodness, it is so much fun and so easy to use.

A sister consultant gave her top 10 reasons why everyone should try Studio J. I thought I would share them with you...
1. It doesn't cost anything so what do you have to lose?
2. It is extremely user-friendly. You don't need to be great with computers to figure it out.
Almost anything you can do on a classic scrapbook page you can do on Studio J ... edge distressing, layering objects, matting photos, adding ribbon and metal embellishments, etc.
3. There are things you can do in Studio J that you CAN'T do with your classic supplies.
4. You can re-size Stickease, change out the paper at the last minute, zoom in or out on a photo while you're working on the project, and change the color of embellishments to coordinate with your page.
5. Studio J is a great tool for planning pages even if you ultimately just decide to make a classic layout.
6. When you're done with a Studio J layout, you don't have a mess all over your scrapbook room.
7. You can scrapbook anywhere that you have Internet access ... restaurants, hotels, work, vacation, the in-laws house, even the pool.
8. When working with Studio J, you never find yourself just "one brad short" or "needing an extra letter-L Stickease". You've got as many embellishments and as many Stickease as you need!
9. Studio J is the only place you can see the new exclusive paper packs!
10. You can earn free shipping and free page protectors by grouping your layouts together and having them all printed at the same time.

When can you access Studio J? Studio J will go live in March, however, Consultants will have access earlier, so if you sign up to become a Consultant, you will get to play with it before it goes live!

I'll be back later today and share with you the layouts I completed yesterday. Not digital layouts, but the paper kind! :)
Thanks for stopping by. So until later today...
Be Safe and Happy Scrapping!

Leanne

Saturday, January 9, 2010

Digital vs Paper

Good Morning!

What kind of scrapper are you? Do you enjoy the feel of the paper and cutting that paper and gluing it down and creating something from just an idea? Or do you love to sit at your computer and move things around and create a layout from the items in your files that are in your computer? I love both worlds! But I am a creature of habit and I started out paper crafting but that doesn't mean I will turn my back on the digital aspect of scrapbooking. What do I do with the layouts I complete them? Yes, I take a digital photograph of that layout so I can share with you. I even have digital albums set up in Picasa. I like the idea that if I need one more thing for layout, I can check my digital scrapbooking files and perhaps find that one thing to add. So, I guess I could be called a "hybrid" scrapper! LOL


Well the other day, I was thinking about creating a card from the digital papers I have stored on my computer. Now, I don't have a whole lot of digital files. But that is changing. I signed up for from Digital Scrapbook Experts "Collect-A-Kit" program. The Collect-A-Kit program sends you daily emails with quality digital scrapbooking item downloads. They send complete kits one piece at a time, with a new kit each month.


You would think with all the paper I have here in the rubber room, I would be able to find some paper to complete a card. I probably could, but I thought to myself, how hard would it be to try to print out some of the digital paper and create a card. So, I opened up my Wishblade program and inserted the paper and cut the pieces I needed. Then I used my cardstock and my Cuddlebug Dotted Swiss folder and my Nestabilities and this is the card I created.


Will I ever give up being a Close To My Heart consultant? Not a chance! I love this company and I love all the yummy and delicious papers they come up with all year long!


I don't see anything wrong from diverting from the norm and trying something new. I use Mojo Monday card sketch for this card. I also used little dew drops and the stamp set is from CTMH's Gracious Greetings stamp set. I used Martha Stewart's doily punch for the scallop edge on the bottom.


I guess, I will head of back to the rubber room. I am working on some layouts, and I hope to have them completed today. So, I can digitally photograph them and share with all of you.


Thanks for stopping by.

Until next time...


Happy Creating, (which ever you love to do paper or digital)


Leanne

Thursday, January 7, 2010

Tickled Pink

Good Morning!

As I mentioned yesterday, I've been spending alot of time here in the rubber room. I wanted to share with you the thank you cards I made this year to send out. I saw on someone's blog (please forgive me, I don't remember who's blog it was) and cute simple attractive card. She had done white on white, with a touch of color. It really was quite striking. So, I decided to fashion my thank you cards from that card. And I already had the ribbon out and the combo was perfect.
I absolutely love black and white and a splash of color.
Products I used to make this card:
White Daisy cardstock, Bubblegum cardstock, both from Close To My Heart. The stamp set is Gracious Greetings from CTMH. I heat embossed the the thank you with Versamark pad and White Embossing powder from CTMH. I used Martha's Stewart's "doily edge" punch for the scallop edge along with my Swiss dot Cuttlebug folder. The ribbon came from my stash, and I think I bought it at Walmart about 4-5 years ago. And the tiny little pearls came from CTMH's Connection Club.
I've started working on layouts again. I am in the process of doing a layout for each of the grandkids. I hope to get at least one completed so I can share. I'll keep you updated.
Thanks for stopping by.
Until next time,
Happy Card Making!
Leanne

Wednesday, January 6, 2010

You're A Hoot


Good Morning!

Since bringing in the New Year, I have been spending a lot of time in the Rubber Room. With the holidays behind us, and the remodel complete, I seem to have time on my hands and the creative juices are flowing.
I brought in the New Year with hubby, and at the stroke of midnight and a peck of a kiss, I was back in the rubber room. I started making some cards for a swap I am in. And wouldn't you know it, the ribbon that gave me my inspiration ran out. I wasn't able to completely finish the cards, so I found some other ribbon that I love and continued on.
As I said before, the ribbon for both cards gave me the inspiration. And since I have such an owl fetish, I thought I would use this cutie on a card. The owl comes from CTMH's "You're A Hoot" stamp set. I used my Cuddlebug folders and my Fiskars embossing plates to emboss some of the cardstock to give the cards some dimension. On the top card, I paint the flourish (from Maya Road) with Making Memories acrylic paint. The flowers are prima flowers and a small dew drop is in the center of them. The colors are CTMH's Ponderosa Pine, Creme Brulee, Juniper and Cranberry.
Now the second card is basically the same. Colors I used here are from CTMH: White Daisy, Black and Bubblegum. I used white embossing powder for my little friend the owl. The flourish is from Prima Marketing, "Say It With Crystals." The flower is from Prima with a dew drop in the center. The little bling for the eyes in both the cards are from CTMH.
And the layout of the card is from CTMH's how to book "Wishes." Its the "Collage" card located on page 97.
I'd like to thank you for stopping by.
So until next time...
Happy Paper Crafting!
Leanne

Tuesday, January 5, 2010

Then and Now Album - Grannie's Special Moments

Welcome back!

This is a little 4"x4" coaster album I made for my sister. She was so tickled to receive it. The day it arrived, she couldn't wait to phone me and to tell me it arrived. She had dinner plans that evening and she said she was taking her little album with her and she was going to show it off.
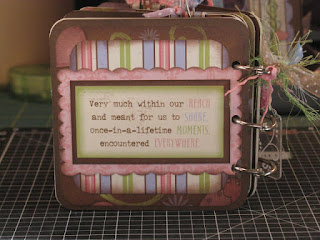
I used Life's Delight Level 2 paper pack from Close To My Heart along with some My Stickease as well. All the other embellishments, I had in my stash. I used my Wishblade to cut out the titles and flowers and other elements of the pages. Now, I wasn't sure how to make each paper different from the one before, so I turned to CTMH's how to book "Cherish" and used various sketches. I reduced each page 75% to achieve the proper dimensions for all the elements of each page.
I think the quote on the backside of the album explains it all. Don't you?
Thanks for stopping by.
Until next time...
Happy Creating!
Leanne

Project Update

I wanted to share with you the projects I worked on over the holiday. I wanted to share them sooner, but since they were Christmas gifts, I didn't want to spoil the surprise. So, I decided to wait till after the holidays and share them. This first project is a photo cube, I made for my sister (Hi Jo!!) to give to her daughter-in-law. Jo said that when Marcie opened up the gift, she thought Marcie was going to cry. Doesn't that give you a warm fuzzy feeling when you've touched someone heart.


That's only one project I completed. I did another one and I'll be posting that tomorrow. Thanks for stopping by. Hope you'll join us again tomorrow to see what else had been brewing in the rubber room.

Till next time,
Happy Creating!

Leanne

Friday, January 1, 2010

Blog Hop

As I was "blurfing" I came across several of my friends who belong to this Stamp of the Month Blog Hop. Thanks to Helen O. for helping with the images of the stamp set. Helen does some terrific tutorials on her blog. I hope you enjoy as much as I do...venturing to everyone's blog and see such wonderful creations. Check them out...


So enjoy hopping from blog to blog!
Till next time.
Happy Blurfing!
Leanne